A couple of months back, I built a chatbot application using React, Node.js, and Vercel Serverless Functions, which I used in my web app, buildcv.makeadifference.app.
In this tutorial, I'll walk you through exactly how I built it, from the backend serverless function that talks to Google's Gemini API, to the React chat widget that displays the AI's response as it's being generated.
By the end of this tutorial, you'll understand:
How to set up a Vercel Serverless function that calls Gemini and streams its response back to the browser in small text chunks.
Why that approach makes a chatbot feel faster and more responsive than waiting for the entire reply to come back at once.
How to build a React component that reads that streaming response and updates the chat window in real time as new text arrives.
We'll also test the endpoint with curl before wiring up the UI, and we'll cover how to actually deploy the whole thing to Vercel.
All of this revolves around a technique called plain-text chunk streaming. Rather than waiting for the AI to generate its entire response and then sending it all back to the browser at once, the serverless function streams the response as a series of small text chunks, writing each one to the browser as soon as it's ready.
This is what gives the chatbot that responsive, "typing" feel you've probably seen in modern AI chat interfaces, instead of a long pause followed by the full answer appearing all at once.
What We'll Cover:
🧩 Architecture Overview
The application is built from two main pieces. The UI component is a React chat widget, where the user types a message and the AI's response gets rendered back to them as it streams in. The backend is a Vercel serverless function (for example, api/chat) that validates the incoming request, calls Gemini, and streams the output back to the browser.
You can read more about Vercel's serverless functions in their official documentation.
Here's how the whole flow works, from start to finish: the browser sends a request to the Vercel function, the Vercel function calls the Gemini API, and Gemini's response is streamed back to the browser chunk by chunk.
In practice, this means the backend sends the response to the frontend in small pieces as they become available, rather than making the user wait for the entire response to be generated before they see anything at all.
✅ Prerequisites
Before you get started, make sure you have the following in place:
Node.js installed locally (Node 18 or later)
A Gemini API key 🔑 from Google AI Studio
A Vercel account and the Vercel CLI
The
@google/genaipackage installed in your function's project, which you can add by runningnpm install @google/genai
You'll also want to store your key in an environment variable called process.env.GOOGLE_API_KEY for local development, and add that same variable in your Vercel project's dashboard (under Settings and then Environment Variables) before deploying, so the API key gets picked up correctly once the application is hosted.
📜 API Contract
Before diving into the code, it's worth taking a moment to understand the "contract" between the frontend and backend – in other words, what the frontend is expected to send, and what the backend expects to receive in return.
When a user sends a message in the chat widget, the frontend makes a POST request to /api/chat with a JSON body containing two things: the message the user just typed, and the résumé data that's already loaded into the app (since this particular chatbot is acting as a résumé coach). The backend then uses both pieces of information together to generate a response that's actually relevant to that user's résumé, rather than a generic reply.
Request:
POST /api/chat
{
  "message": "How can I improve my resume summary?",
  "resume": { "name": "...", "experience": [...], "skills": [...] }
}
⚙️ Backend (the Vercel Serverless Function)
This is the heart of the application: a single Vercel serverless function that receives the chat request, validates it, passes it along to Gemini, and streams the AI's response back to the browser as it's generated.
Below is the full handler, and I'll walk through what each part of it is doing once you've had a look at the whole thing.
const { GoogleGenAI } = require("@google/genai");
const ai = new GoogleGenAI({
    apiKey: process.env.GOOGLE_API_KEY,  // GOOGLE_API_KEY can be configured in Vercel
});
const MAX_TEXT_LENGTH = 2000;
const MAX_ARRAY_LENGTH = 50;

function sanitizeString(input = "") {
    // sanitize your input string here
}

function sanitizeObject(obj = {}) {
    // sanitize your resume object
}

const allowCors = fn => async (req, res) => {

    res.setHeader('Access-Control-Allow-Origin', '<<your web app url goes here>>');
    res.setHeader('Access-Control-Allow-Methods', 'GET, POST, OPTIONS');
    res.setHeader('Access-Control-Allow-Headers', 'Content-Type, Authorization');

    // ✅ Handle preflight request
    if (req.method === 'OPTIONS') {
        return res.status(200).end();
    }
    // another option
    res.setHeader('Access-Control-Allow-Methods', 'GET, HEAD, OPTIONS, POST, PUT, DELETE')
    res.setHeader(
        'Access-Control-Allow-Headers',
        'X-CSRF-Token, X-Requested-With, Accept, Accept-Version, Content-Length, Content-MD5, Content-Type, Date, X-Api-Version'
    )
    if (req.method === 'OPTIONS') {
        res.status(200).end()
        return
    }
    return await fn(req, res)
};

const handler = async (req, res) => {

    if (req.url === '/api/chat' && req.method === 'POST') {

        const { message, resume } = req.body || {};

        const safeMessage = sanitizeString(message);
        const safeResume = sanitizeObject(resume);

        if (!safeMessage) {
            return res.status(400).json({ error: "Invalid message" });
        }

        if (!safeMessage || !safeResume) {
            return res.status(400).json({ error: 'Missing message or resume data' });
        }

        try {
            const stream = await ai.models.generateContentStream({
                model: "<<GEMINI MODEL GOES HERE>>",
                contents: `
            You are a professional Resume Coach AI.

            - Always respond clearly, politely, and professionally.
            - <<Add descriptive instruction for the prompt based on your requirement>>
            - Resume data:
${JSON.stringify(safeResume, null, 2)}

User question:
${safeMessage}
`,
            });
            res.setHeader("Content-Type", "text/plain; charset=utf-8");
            res.setHeader("Cache-Control", "no-cache");

            for await (const chunk of stream) {
                const text = chunk.text;
                if (text) {
                    res.write(text);
                }
            }

            res.end();
        } catch (error) {
            console.error('Gemini Error:', error);
            res.status(500).json({ error: 'AI request failed' });
        }
    }

    // I have added a health check for testing the handler
    if (req.url === '/api/chat?type=healthcheck' && req.method === 'GET') {
        res.status(200).json({ message: 'Hello from the chat endpoint!' });
    }
}

module.exports = allowCors(handler)
Now let's break that down piece by piece:
Setting up the Gemini client: At the top of the file, we create a
GoogleGenAIclient using the API key stored in theGOOGLE_API_KEYenvironment variable. This client is what we'll use to actually talk to Gemini throughout the rest of the function.Sanitizing the input: Before we do anything with the incoming request, we run the message and résumé through
sanitizeStringandsanitizeObject. These functions strip out anything unexpected or oversized, so we're never passing untrusted user input straight through to the AI without a check first.Handling CORS: The
allowCorswrapper function sits around our handler and takes care of Cross-Origin Resource Sharing. Since the chat widget might be embedded on a different domain than the Vercel function itself, we need to explicitly allow requests from that domain and handle theOPTIONSpreflight request that browsers automatically send before the realPOSTrequest goes through.Validating the request: Inside the handler itself, we check that both
messageandresumemade it through sanitization successfully. If either one is missing or invalid, we return a 400 error right away instead of wasting a call to Gemini on a request we already know is bad.Calling Gemini and streaming the response: This is the key part of the whole tutorial. Instead of calling a regular "generate content" method and waiting for the full response to come back, we call
generateContentStream, which returns an async iterable. We loop over that stream with afor await...ofloop, and every time a new chunk of text comes in, we immediately write it to the response withres.write(text). This is exactly what lets the browser start receiving text before Gemini has even finished generating the full answer.Error handling and the health check: If anything goes wrong while talking to Gemini, we catch the error, log it, and return a 500 response so the frontend knows something failed. There's also a simple
GEThealth check endpoint you can hit to confirm the function is up and running before you start testing the actual chat flow.
🧪 Testing the Endpoint Before Wiring Up the UI
Before you start building out the frontend, it's a good idea to confirm that the serverless function is actually streaming chunks the way you expect. You can do that with a simple curl request.
curl -N -X POST "https://YOUR_APP.vercel.app/api/chat?type=chat" \
  -H "Content-Type: application/json" \
  -d '{"message":"Give me 3 resume summary tips","resume":{"name":"Test"}}'
The -N flag disables curl's output buffering, so you'll see the text appear incrementally in your terminal rather than all at once. That's your confirmation that the streaming is working end to end, before you've written a single line of frontend code.

🎨 Frontend: Reading the Response Stream
Here's a screenshot of the chat widget UI I built in React:
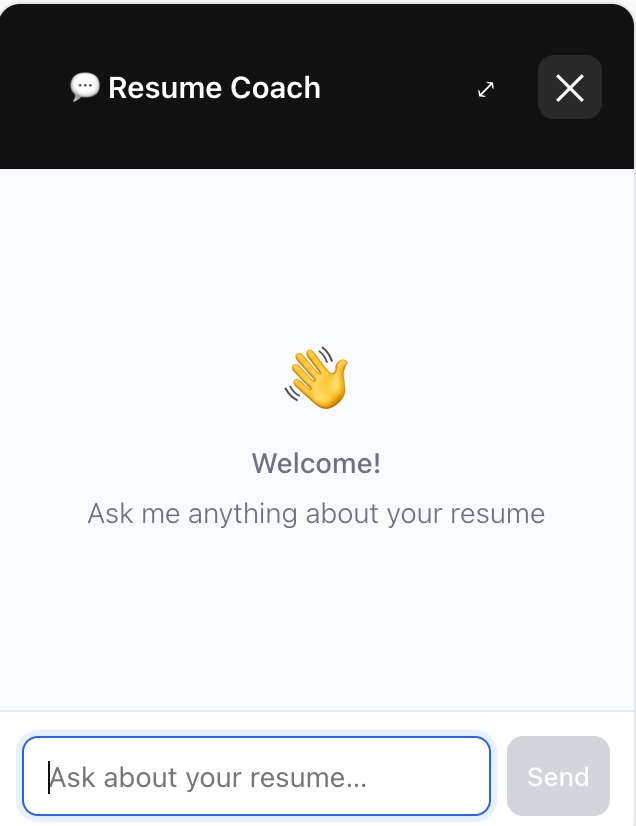
We won't walk through building that UI from scratch here. The layout, styling, and message list are really up to you and your own design preferences.
What we will cover is the function that actually powers it: the code behind the send button, which takes what the user typed, sends it off to our serverless function, and reads back the streaming response so the widget can display the AI's reply as it arrives, piece by piece, the way you see it happening in the screenshot above.
Before jumping into that function, here's the shell it lives inside, so you can see where it fits in the component:
function ChatWidget({ resume }) {
  const [messages, setMessages] = useState([]);
  const [input, setInput] = useState("");
  const [loading, setLoading] = useState(false);
  const [error, setError] = useState(null);

  async function sendMessage() {
    // ...actual function is added below
  }

  return (
    <div className="chat-widget">
      {/* message list, input box, and a send button that calls sendMessage() */}
    </div>
  );
}
That's the shell the function lives in: state for the message list, the input box, a loading flag, and an error slot. sendMessage is what fires when the send button is clicked.
Here's the full function, sendMessage, which runs whenever the user types a prompt and clicks send. This is the piece of code that connects the UI shown above to the backend we just built.
async function sendMessage() {
    const messageText = input.trim();
    if (!messageText || loading) return;

    const userMessage = { role: "user", text: messageText };
    setMessages((message) => [...message, userMessage]);
    setInput("");
    setLoading(true);
    setError(null);

    try {
      const res = await fetch("<<YOUR VERCEL SERVERLESS FUNCTION URL GOES HERE>>/api/chat", {
        method: "POST",
        headers: { "Content-Type": "application/json" },
        body: JSON.stringify({ message: messageText, resume })
      });

      if (!res.ok) {
        throw new Error(`Failed to get response: ${res.status}`);
      }

      const reader = res.body.getReader();
      const decoder = new TextDecoder();

      let fullText = "";
      setMessages((message) => [...message, { role: "assistant", text: "" }]);

      while (true) {
        const { value, done } = await reader.read();
        if (done) break;

        const chunk = decoder.decode(value);
        fullText += chunk;

        setMessages((message) => {
          const updated = [...message];
          updated[updated.length - 1] = { role: "assistant", text: fullText };
          return updated;
        });
      }

    } catch (err) {
      setError("Failed to send message. Please try again.");
      setMessages((m) => [...m, {
        role: "assistant",
        text: "Sorry, I encountered an error. Please try again later."
      }]);
    } finally {
      setLoading(false);
    }
  }
Here's what's happening step by step:
First, when the user clicks send, we grab their typed message and immediately add it to the messages array so it shows up in the chat right away.
Then we send a POST request to our /api/chat endpoint with the message and the résumé data. Once we get a response back, we call res.body.getReader() to get a ReadableStreamDefaultReader on the response body, and we use a TextDecoder to convert each raw chunk of bytes into readable text.
From there, we loop, reading one chunk at a time and appending it to a growing fullText string, and on every iteration we update the last message in the chat with that text.
That loop is exactly what creates the "typing" effect you see in the screenshot above: the assistant's message in the chat widget visibly grows word by word as new chunks arrive, instead of popping in all at once. This pattern is a bit different from the typical fetch().then(res => res.json()) call you're probably used to, so it's worth pausing on if you haven't streamed a fetch response before.
🚀 Deploying
Once you've confirmed that the function and UI both work locally, deploying comes down to three steps:
Set your environment variable in Vercel. In your project's dashboard, go to Settings and then Environment Variables and add
GOOGLE_API_KEYwith the same value you used locally.Update your CORS origin and fetch URL. In the backend, point
allowCors'sAccess-Control-Allow-Originheader at your real deployed domain. In the frontend, point thefetchcall at that same deployed function URL instead of localhost.Deploy, using whichever of the two options below fits your workflow.
Option A: Deploy from the CLI
npm install -g vercel   # if you haven't already
vercel login
vercel --prod
vercel login authenticates your machine, and vercel --prod builds and ships straight to production from your project directory. This is a good fit for one-off deploys, or when you want full control over exactly when a deploy happens.
Option B: Deploy via GitHub integration
Push your project to a GitHub repository (if it isn't already).
In the Vercel dashboard, click Add New and then Project, then select your repository.
Vercel auto-detects your framework settings. Confirm them and click Deploy.
From then on, every push to your main branch triggers an automatic redeploy.
I've always preferred this option and it has been more convenient if you're actively iterating on the project, since you never have to remember to run a deploy command yourself.
Once the deploy finishes, Vercel will give you a live URL for your app. Test it with the same curl command from earlier, swapping in your production URL, to confirm that streaming is working correctly in production before you consider yourself done.
⚠️ A Note on CORS for Embedded Widgets
If you're planning to embed this chat widget on a website that lives on a different domain than your Vercel app (for example, embedding it as a widget on a marketing site while the function itself is deployed elsewhere), you'll run into CORS restrictions by default. Browsers block requests to a different origin unless the server explicitly allows them.
To handle this correctly, your serverless function needs to respond to the OPTIONS preflight request that the browser automatically sends before the real POST request, and it needs to set the Access-Control-Allow-Origin header to match the domain your widget is actually running on. That's exactly what the allowCors wrapper in the backend code above is doing for you.
🎉 Conclusion
Plain-text chunk streaming is what makes a chatbot feel responsive on Vercel. Because the user sees the response appear gradually, they aren't stuck waiting for the entire answer to be generated before anything shows up on screen.
If you'd like to keep building on this, here are a few natural next steps to consider: adding rate limiting to prevent abuse of the endpoint, adding conversation persistence with something like KV, Redis, or Postgres so chat history isn't lost on refresh, and adding a stop button to the widget so users can cancel a response that's already in the middle of generating.
If you build something with this approach, I'd love to hear about it! What are you planning to build with Gemini and Vercel?
Hope you have a blessed week! 😇